Lack HACK!: Converting Ikea Lack Tables Into Cube Side Tables
It’s another Ikea Lack Hack.
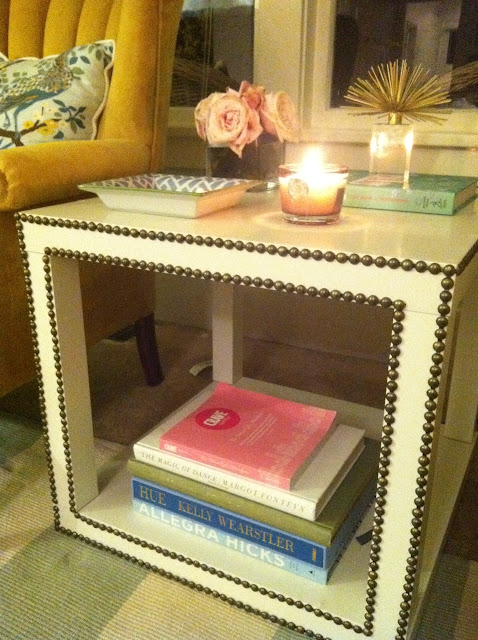
I tried my hand at turning these crazy inexpensive pieces into something a little more Kim-like. And this is what I got….

Inspired by this little number,
Keep reading for more details on how I pulled this one off!

1) To start, I assembled two of the tables completely.
2) Then using the 2 leftover tabletops, I drilled all the way through the factory-drilled holes at each corner so that there were 4 holes straight through each tabletop, instead of only half-way through.
3) I flipped the assembled tables updside down and positioned a separate tabletop over each, face down. (You may choose to glue the tabletops into position here for added staying power.)
4) Using extra long screws (probably longer than 2″), I then screwed from the bottom of the separate tabletop into the table legs of the assembled Lacks. It was really easy for me to do this by hand because the table legs are only particle board. No drill needed!
5) Flip the tables over and enjoy.
(I apologize if this is confusing. I did this long before ever thinking to photograph the process for a blog. Ask any questions you may have in the comments below, and I’ll respond ASAP!)

The process was actually quite easy. I thought I may need to use glue of some sort to hold the legs on, but because I was gung-ho to finish the project, I skipped that step. These have been holding up for well over a year now, and they are perfect for our family.
Though they started out as mere placeholders for these more expensive Ballard beauties,

I think I actually prefer these a bit more. They are much more family friendly, and they fit my undying need for constant change. I don’t mind if the kids climb all over them. If they get damaged, I can easily and inexpensively whip up some more in a new color. Or, for a change of pace, I could even cover them with some type of vinyl or fabric like my inspiration picture above.
NOTE: The glossy surface requires that I wipe the tables down daily because these are little fingerprint magnets. Also, after a few months, I did have to glue down the veneer surface (underneath the tabletops) using a strong glue because they were separating from the particle board. I simply used LocTite, turned them upside down, and weighted them with books until dry. Since then, no separation issues to note….for the tables, at least. My 18-month old son’s separation issues are a completely different story….


By the way, we normally keep 2 small ottomans (one is pictured on the far left) under the tables. Ours are these from Target, purchased about 2 years ago on sale. They come in handy whenever we need extra seating, and their storage space is invaluable. (Please ignore the un-vacuumed floor and the jumbo Legos under the couch. This is real life, right? Just keeping it real!)
Love it cousin. Need to come over & see in person. Of course enjoy some much needed family time. Great job!
Thanks, Pell!
love it! with the high gloss finishes.. do you think the nailheads would still work?
I definitely think it could work. Sounds like that would look great! Let me know if you try it.
love love love! Where did you get the tray from?
Hi Ray! Thanks for stopping by. The tray is actually a mirror I picked up from Target a few years ago. It’s the perfect length for a tray and has a deep frame, so I figured why not.
Hi,Stumbled across your website when looking for a cube table. This is fantastic!
One question…did both sides of the legs come with holes already? You mentioned that you drilled all the way through the second table top to attach it – but did you have to do any prep to the bottom of the legs?
Thanks so much!
Hey Allison! Welcome!I didn’t have to prep the legs in any way. The screws just went right through. The lack legs are made of some type of composite particle board material on the inside and it’s wrapped with the laminate material on the outside. The screws easily pushed straight through the particle board. No pre-drilling required!
If you try it, please come back & share your results with us!
Hi did the tables each come with an extra table top when you bought them?
Hi Morgan! The tables did not come with the extra tabletop. I had to purchase two tables for each cube I made. So in order to make the two cube tables you see, I purchased 4 tables from Ikea.The tables range in price from $7.99 to $12.99 each, so it still is a fairly inexpensive project to tackle. And right now, if you’re an Ikea Family member, the tables are as low as $4.99 each!
Let me know if you decide to give it a try.
I’m blown away, how creative and beautiful.
Thanks Sherry!